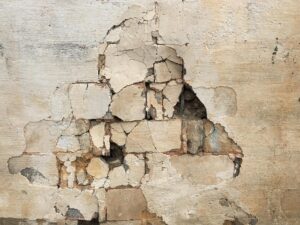
Concrete slab cracks, caused by soil settlement, moisture changes, freeze-thaw cycles, or structural issues, require prompt attention for aesthetic and structural integrity. Restoration involves assessment, crack type evaluation, and tailored repair strategies. Materials include high-quality epoxy resins, tools like wire brushes and pressure washers, and specific fillers/caulk. The process includes cleaning, preparing the crack, selecting the right filler, filling, smoothing, and maintaining the slab with regular cleaning and sealing for long-lasting results.
Concrete slab restoration is an essential process to revive damaged structures, ensuring longevity and safety. This article guides you through the complete concrete slab repair journey, from identifying common crack causes to implementing effective crack repair techniques. We’ll explore various assessment methods, provide a comprehensive overview of materials and tools, and offer a step-by-step guide for successful restoration. By understanding crack repair, you can transform damaged slabs into sturdy, sustainable surfaces.
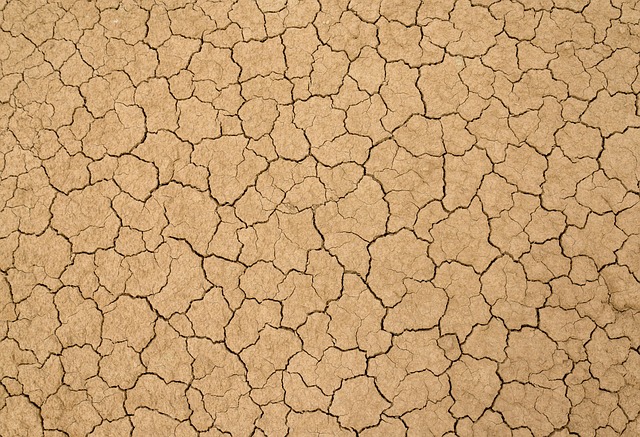
Understanding Concrete Slab Damage: Common Causes of Cracks
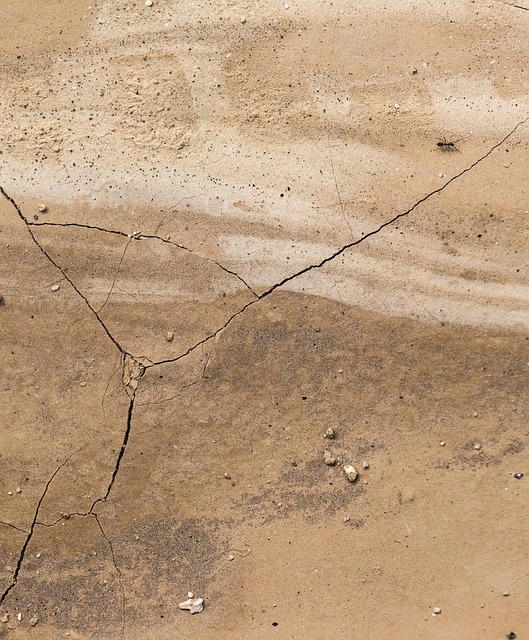
Concrete slabs, despite their sturdy appearance, are susceptible to damage over time due to various environmental factors and structural stress. Understanding the common causes of cracks is essential in effective concrete slab restoration. One of the most prevalent issues leading to crack repair is settlement or shifting of the underlying soil. This movement can be caused by uneven weight distribution, poor soil compaction, or changes in moisture levels, resulting in cracks that range from hairline fissures to wider gaps.
Another significant contributor to concrete slab damage is freeze-thaw cycles, especially in regions with extreme climates. Water seeps into cracks and freezes, expanding and putting immense pressure on the concrete. This process repeats itself over seasons, gradually widening the cracks. Additionally, concrete slabs can suffer from structural failures due to improper construction, aging, or heavy loads, leading to more significant damage that requires prompt crack repair to prevent further deterioration.
Assessment and Inspection: Identifying Repair Needs
Concrete slab restoration begins with a thorough assessment and inspection, which is crucial in identifying repair needs. During this initial phase, professionals carefully examine the concrete surface for various defects, including cracks. These cracks can range from small, hairline fractures to larger, structural breaks that compromise the integrity of the slab. By closely examining the extent, pattern, and depth of these cracks, restoration specialists gain valuable insights into the underlying issues and determine the most effective crack repair methods.
Additionally, inspectors look for signs of wear and tear, settlement, or other damage that might have contributed to the crack formation. This process involves utilizing specialized tools and techniques to assess the stability and load-bearing capacity of the concrete slab. Once the assessment is complete, a comprehensive report is generated, outlining the identified issues and recommending appropriate restoration strategies tailored to meet the specific needs of each project.
Crack Repair Techniques: A Comprehensive Overview
Concrete slabs, over time, can develop cracks due to various factors like aging, environmental conditions, and structural shifts. Effectively repairing these cracks is essential for both aesthetic purposes and structural integrity. There are several crack repair techniques available, each suited to different types and severity of cracks.
For smaller, non-structural cracks, a common approach involves cleaning the area, applying an epoxy or polymeric injection compound, and filling the crack. This method not only restores the surface but also prevents further damage. In cases of larger cracks that compromise structural stability, a more comprehensive repair is required. This might include removing the damaged concrete, reinforcing the slab with steel bars, and casting new concrete to create a strong bond with the existing slab. Advanced techniques like carbon fiber reinforcement offer an alternative for controlling crack propagation without extensive removal or replacement.
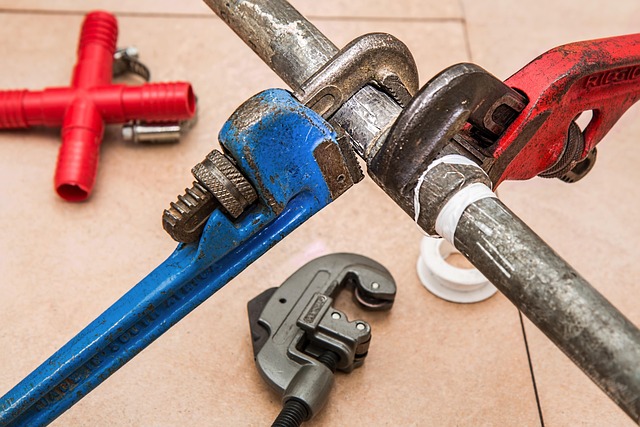
Materials and Tools for Effective Concrete Restoration

Restoring a concrete slab requires the right materials and tools to achieve a long-lasting, seamless finish. High-quality epoxy resins are a popular choice for crack repair due to their strength and ability to bond with concrete. These resins come in various types, each suited for different levels of damage and environmental conditions. When selecting an epoxy, consider factors like flexibility, chemical resistance, and cure time.
Essential tools for effective concrete restoration include wire brushes, chisels, and hand tools for surface preparation and cleaning. Pressure washers can also be used to remove loose debris and contaminants. For crack filling, you’ll need a crack filler or caulk specifically designed for concrete, along with the appropriate applicators and pumps. Safety gear, such as gloves and eye protection, is crucial during the restoration process to prevent injuries from sharp edges and chemical exposure.
Step-by-Step Guide to Restoring a Damaged Concrete Slab
Restoring a damaged concrete slab involves a systematic approach, especially for those looking into crack repair. Here’s a step-by-step guide to help you navigate this process effectively:
1. Assess the Damage: Begin by thoroughly inspecting the concrete slab to identify the extent of damage, focusing on cracks. Note their width, length, and depth as these factors will influence your restoration method. Also, check for any signs of structural instability or weakness.
2. Clean the Area: Before starting any repair work, clean the surface to remove loose debris, dust, and grease. This step ensures that the concrete slab is free from contaminants, promoting better adhesion during the repair process. Use a pressure washer or a wire brush for thorough cleaning.
3. Prepare the Crack for Repair: Once cleaned, prepare the crack for filling by removing any remaining loose concrete with a chisel or hammer and chisels. Ensure the edges of the crack are clean and sharp, as this will help in achieving a strong bond between the repair material and the existing slab.
4. Choose the Right Repair Material: Select a suitable epoxy or polymer-based crack filler designed for concrete restoration. These materials offer superior strength and durability, ensuring the cracks don’t reappear soon after repair. Follow the manufacturer’s instructions when mixing the compound to achieve the optimal consistency.
5. Fill the Crack: Apply the chosen repair material into the crack using a putty knife or trowel, filling it completely and smoothly. Ensure you push the material well into the depth of the crack for effective sealing and support.
6. Smoothen and Levelize: After filling, use the tool used to apply the compound to smoothen the surface, ensuring it’s level with the surrounding concrete. This step is crucial for achieving a seamless finish and preventing water accumulation in the repaired area.
Maintaining Your Restored Concrete: Tips for Longevity

After restoring your concrete slab, proper maintenance is key to ensuring its longevity and preserving your investment. Regular cleaning and sealing are essential steps to protect the surface from staining and moisture damage. Use a mild detergent and a soft-bristled brush to gently clean any dirt or debris, avoiding harsh chemicals that could etch the concrete.
For crack repair, fill minor cracks with a suitable epoxy or polyurethane product, ensuring it matches the concrete’s texture. Major cracks may require reinforcement with steel bars before filling. Sealing the concrete slab once every 1-2 years will create a protective barrier against elements like sun, rain, and traffic wear, thus slowing down the aging process and reducing the need for future repairs.